Discover how to revolutionize your Roblox game audio with this comprehensive guide to Roblox Studio sounds Learn to add custom sound effects background music spatial audio and optimize performance for an immersive player experience We cover essential tips tricks and troubleshooting for creators of all levels to elevate their projects and engage players more deeply from understanding asset management to implementing dynamic soundscapes Unlock the full potential of audio in your Roblox creations and make your games truly stand out in the crowded Roblox universe This resource is packed with practical advice to help busy creators enhance their games efficiently and effectively making every sound count for maximum impact for every player
How do I add sound effects to my Roblox game?
You add sound effects in Roblox Studio by first uploading your audio file (MP3 or OGG) to the Asset Manager. Once uploaded, insert a 'Sound' object into your game, paste the asset ID into its 'SoundId' property, and then use scripts (e.g., Sound:Play()) to trigger the sound at specific events. You can attach sounds to 'Parts' for spatial audio or place them in 'StarterGui' for UI sounds.
Why isnt my audio playing in Roblox Studio?
Audio in Roblox Studio might not be playing due to an incorrect 'SoundId', the 'Playing' property being unchecked, the volume set to 0, or the audio asset still pending moderation. Check the 'Output' window for script errors, ensure your 'SoundId' is valid (rbxassetid://), verify the 'Volume' is above 0, and confirm the audio's moderation status in the Asset Manager.
How do I make a sound loop in Roblox Studio?
To make a sound loop in Roblox Studio, select the 'Sound' object in the Explorer window. In the Properties window, simply check the 'Looped' checkbox. If you're controlling the sound via a script, ensure the 'Looped' property is set to 'true' (e.g., sound.Looped = true) before calling the Sound:Play() method. This will cause the sound to repeat continuously.
What are the best practices for Roblox Studio sound design?
Best practices for Roblox Studio sound design include using high-quality, optimized audio files, implementing spatial audio for realism, balancing volumes between music and sound effects with 'SoundGroup's, and preloading critical sounds to prevent delays. Avoid excessive concurrent sounds to maintain performance, and always test your audio on various devices, including mobile, for consistent player experience.
Can I use copyrighted music in my Roblox game?
No, you generally cannot use copyrighted music in your Roblox game without explicit permission or a proper license. Roblox strictly enforces copyright policies, and unauthorized use can lead to asset removal, game takedowns, or account suspension. Always use Roblox's Creator Marketplace audio, royalty-free music, or audio you have personally created or legally licensed to ensure compliance.
How do I control sound volume with a script in Roblox Studio?
You control sound volume with a script in Roblox Studio by accessing the 'Volume' property of a 'Sound' object. For example, to set the volume to half, you would write sound.Volume = 5 (since the range is 0-10). You can also dynamically adjust this property in response to game events, such as a player entering an area or interacting with an object, using a 'LocalScript' or 'ServerScript' as appropriate.
Where can I find free sound effects for Roblox Studio?
You can find free sound effects for Roblox Studio primarily in the Roblox Creator Marketplace via the Toolbox, which offers a vast library of pre-cleared assets. Other reputable sources include Freesound.org and Zapsplat.com, which provide royalty-free audio under various Creative Commons or free-to-use licenses. Always check the specific license terms for attribution requirements before using any external assets in your game.
Hey fellow creators! Ever poured hours into building an amazing Roblox experience, only to find it feels a little… quiet? You're not alone. Many busy gamers like us, balancing work, family, and our passion for creating, often overlook one of the most powerful tools for immersion: sound. A game without engaging audio is like watching a blockbuster movie on mute – it just loses its magic. The average US gamer, often around 36 years old and spending 10+ hours a week gaming, craves rich, full experiences, whether they're unwinding after work or connecting with friends in social games. High-quality sound significantly boosts player engagement, makes your worlds feel alive, and provides crucial feedback, enhancing everything from combat to exploration.
You might be thinking, "But I'm not an audio engineer!" or "Roblox Studio sounds seem complicated." We get it. Juggling limited time with a desire to build something truly special can be tough. That's why this guide is designed for you. We'll demystify Roblox Studio sounds, offering practical, no-nonsense advice to help you implement professional-sounding audio without a massive time sink. By the end, you'll know exactly how to add, optimize, and troubleshoot sound in your Roblox games, making them stand out in a competitive market where immersive experiences are key. Let's make your creations sound as good as they look, captivating players and keeping them coming back for more!
How Do I Add Custom Sounds and Music in Roblox Studio?
Adding custom sounds and music in Roblox Studio is a straightforward process that significantly elevates your game's atmosphere. You'll typically use the 'Asset Manager' to upload your audio files, then link them to 'Sound' instances within your game world. This method ensures your unique audio vision comes to life.
Here's a step-by-step guide to get your custom audio into Roblox:
- Prepare Your Audio File: Ensure your sound file is in a supported format like MP3 or OGG, and it meets Roblox's size limits (currently around 7-10 minutes or 20MB for most audio).
- Open the Asset Manager: In Roblox Studio, navigate to the 'View' tab and click on 'Asset Manager'. This panel is your central hub for managing all assets, including audio.
- Upload Your Audio: In the Asset Manager, select the 'Audio' tab. Click the 'Import' button (often a small icon resembling an upward arrow or plus sign) and browse your computer for the audio file you want to upload. Roblox will process and moderate the audio; this might take a few minutes for new uploads.
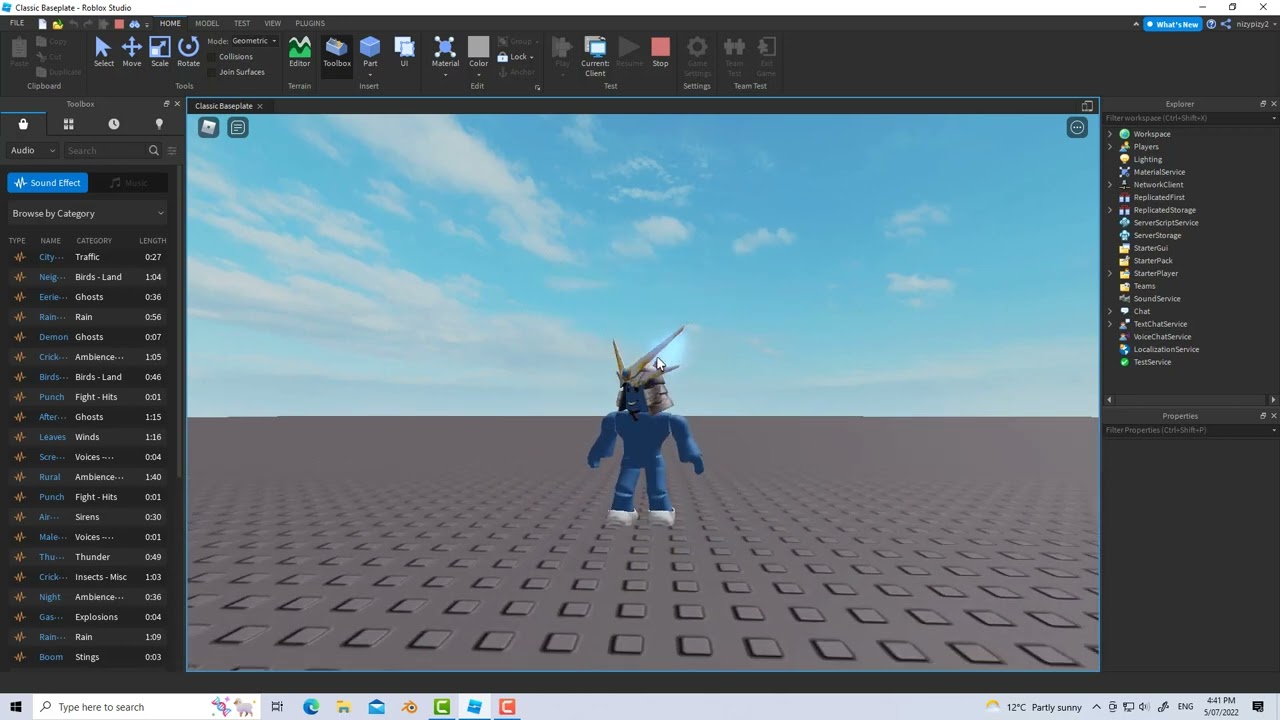
- Insert a Sound Instance: Once uploaded and approved, right-click on the audio asset in the Asset Manager and choose 'Insert With ID'. This action automatically creates a 'Sound' object in your 'Workspace' or wherever you have selected. Alternatively, you can manually insert a 'Sound' object into a Part, a ScreenGui, or anywhere suitable in your hierarchy (e.g., Workspace, Lighting, ReplicatedStorage) by clicking the '+' icon next to an object and searching for 'Sound'.
- Configure the Sound Properties: Select the 'Sound' object in the Explorer window. In the 'Properties' window, you'll see various settings:
- SoundId: If you manually inserted a Sound object, paste the Asset ID of your uploaded audio here (found in the Asset Manager).
- Volume: Adjust the loudness of the sound (0 to 10).
- Looped: Check this box if you want the sound to play continuously (great for background music or ambient noise).
- Playing: Check this if you want the sound to start playing immediately when the game loads or when the Sound instance is created.
- PlaybackSpeed: Change the speed of the audio (1 is normal speed).
- TimePosition: Set the starting point of the sound in seconds.
- RollOffMode / RollOffMaxDistance / RollOffMinDistance: These are crucial for spatial audio, which we'll cover next.
By following these steps, you'll have your custom audio ready to integrate into your game scripts and enhance player interaction.
What Are Best Practices for Implementing Roblox Studio Sound Effects?
For busy creators, implementing Roblox Studio sound effects efficiently and effectively is key to game quality. Focus on performance, player feedback, and immersion. Avoid overdoing it, prioritize high-quality assets, and manage your audio intelligently to create a polished experience that resonates with today's gamers who appreciate refined details.
Here are some best practices that experienced developers follow:
- Use High-Quality, Optimized Audio: Always start with clear, well-recorded audio files. Compress them appropriately (MP3 or OGG) to keep file sizes down without sacrificing too much quality. Large audio files can impact loading times and performance, especially on mobile devices where a significant portion of US gamers play.
- Contextual Sound Design: Every sound effect should serve a purpose. Does it provide feedback (e.g., successful action, damage taken), enhance immersion (e.g., footsteps, environmental ambient sounds), or contribute to the narrative? If a sound doesn't add value, consider removing it.
- Spatial Audio for Realism: Leverage Roblox's spatial audio capabilities for 3D sounds. Attach 'Sound' objects to 'Parts' that emit the sound, and configure 'RollOffMode' properties. This makes sounds appear to come from a specific location, increasing realism and player orientation.
- Variety and Randomization: Avoid repetitive sounds by using slight variations or random pitches for common actions (e.g., gunshots, footsteps). This prevents audio fatigue and makes the game world feel more dynamic and less monotonous for players who might spend hours in your game.
- Volume Control and Mixing: Balance your sound effects, music, and UI sounds carefully. Use 'SoundGroup' objects to manage categories of sounds (e.g., all UI sounds, all environmental sounds) and adjust their collective volume. Give players control over individual sound categories in your game settings, a feature highly valued by today's sophisticated gamers who want a customized experience.
- Performance Optimization:
- Preload Sounds: For critical sounds, use
ContentProvider:PreloadAsync()to load them before they are needed. This prevents audio from cutting out or having delays during intense gameplay moments. - Reuse Sound Instances: Instead of creating new 'Sound' objects every time a sound needs to play, reuse existing ones. Simply change their 'SoundId' or replay them using
Sound:Play(). - Limit Concurrent Sounds: Be mindful of how many sounds are playing simultaneously. Too many can strain performance. Consider a system to prioritize or fade out less important sounds.
- Preload Sounds: For critical sounds, use
- Test Across Devices: Always test your audio on different devices (PC, mobile, tablet) and internet connections. Sound performance can vary greatly, and ensuring a consistent experience is crucial for reaching a broad US gaming audience.
How Can I Make My Roblox Game Sounds Spatial and Immersive?
Making your Roblox game sounds spatial involves attaching 'Sound' instances directly to physical 'Parts' in your 3D world and configuring their spatial properties. This creates the illusion that sounds originate from specific locations, allowing players to pinpoint sources and greatly enhancing immersion. It's a game-changer for realism and player engagement.
To implement spatial audio effectively:
- Attach Sound to a Part: Instead of placing a 'Sound' object in 'StarterGui' or 'ReplicatedStorage', place it as a child of the 'Part' that you want to emit the sound. For example, a campfire sound would be a child of the campfire 'Part'.
- Configure RollOffMode: Select the 'Sound' object. In the 'Properties' window, locate the 'RollOffMode' property.
- Inverse: (Default) Sound volume decreases rapidly with distance.
- Linear: Sound volume decreases linearly with distance.
- InverseTaper: A blend of inverse and linear, offering good control.
- Custom: Allows for a custom curve via 'RollOffCurve' (advanced).
- Set RollOffMinDistance and RollOffMaxDistance: These two properties define the range within which the sound is audible and how its volume fades.
- RollOffMinDistance: The distance from the sound source where the volume starts to decrease. Closer than this, the sound is at full volume.
- RollOffMaxDistance: The distance beyond which the sound is completely inaudible.
- Consider Positional Effects: Roblox automatically handles panning (left/right ear sound) based on the listener's position relative to the sound source when 'Sound' is attached to a 'Part'. This significantly contributes to the 3D effect.
- Testing is Crucial: Walk around your game world and listen to how sounds behave from different angles and distances. Adjust 'RollOffMode' and distance properties until the audio feels natural and immersive. This iterative process is vital for crafting a high-quality audio experience, especially important for social and exploration-focused games popular among today's gamers.
Why Aren't My Roblox Studio Sounds Playing or Working Correctly?
Troubleshooting Roblox Studio sounds can be frustrating, but common issues often stem from incorrect 'SoundId's, improper placement, or muted properties. The primary reason a sound might not play is often a broken 'SoundId' or the 'Playing' property being set to false. Additionally, problems with Roblox's audio moderation or local volume settings can prevent sounds from functioning as expected.
Here's a checklist for debugging Roblox Studio sound problems:
- Check the SoundId: Ensure the 'SoundId' property in your 'Sound' object is correct and valid. It should be in the format
rbxassetid://[your asset ID]. A common mistake is using a deprecated ID or one that hasn't been moderated by Roblox yet. Verify the ID in your Asset Manager. - Verify Roblox Moderation Status: Newly uploaded audio assets must be moderated by Roblox. If an audio asset is still pending or has been declined, it won't play. Check the Asset Manager for the status of your uploaded audio.
- 'Playing' Property and Scripting: Is the 'Playing' property checked in the 'Sound' object's properties? If not, you'll need to use a script to call
Sound:Play()when you want the sound to start. Conversely, if it's checked but still not playing, ensure no script is immediately callingSound:Stop(). - 'Looped' Property: If it's background music or ambient sound, make sure 'Looped' is checked if you intend it to play continuously.
- Volume Settings:
- Sound Object Volume: Check the 'Volume' property of the 'Sound' object itself (0-10). Is it set to 0?
- SoundGroup Volume: If your sound is part of a 'SoundGroup', check that 'SoundGroup's 'Volume' property.
- Roblox Game Settings: Ensure your in-game sound settings (if you've implemented them) or the Roblox client's overall volume isn't muted or extremely low.
- System Volume: Is your computer/device volume turned up?
- Placement of the Sound Object:
- Local vs. Server: If a 'Sound' object is added to 'StarterGui' or a player's 'PlayerGui', it's local to that player. If it's in the 'Workspace', it's usually replicated to all players. Ensure the 'Sound' object is in a location where the client can actually hear it.
- Spatial Audio Issues: If it's a spatial sound, check 'RollOffMaxDistance'. Are you too far from the sound source? Is the sound attached to a 'Part' that's anchored or exists correctly in the world?
- Script Errors: Review your 'Output' window for any errors related to your sound scripts. A typo in
Sound:Play()or trying to play a non-existent sound object will throw an error. - Network Issues: In rare cases, slow internet or network problems can delay sound loading. Preloading important sounds can help mitigate this.
Can I Use Copyrighted Music and Sound Effects in Roblox Studio?
No, generally you cannot use copyrighted music and sound effects in Roblox Studio without explicit permission or a license. Roblox has a strict copyright policy, and using unauthorized copyrighted material can lead to your audio assets being taken down, your game being removed, or even your account being suspended. It's a critical legal point for creators to understand, especially those aiming to monetize their games.
Here's what you need to know about copyrighted audio:
- Roblox's Stance: Roblox actively moderates uploaded content for copyright infringement. Their terms of service and community guidelines explicitly prohibit the use of copyrighted material without proper authorization.
- Consequences: If you upload or use copyrighted audio without permission:
- The audio asset will likely be rejected or removed by Roblox moderation.
- If it makes it into a game, the game itself could be taken down.
- Repeated offenses can lead to account suspension or termination.
- You could face legal action from the copyright holder, though Roblox usually handles the initial enforcement.
- Safe Sources for Audio: To stay safe and avoid headaches, utilize these options:
- Roblox's Creator Marketplace Audio: Roblox provides a vast library of free-to-use sounds and music that are cleared for use in Roblox games. This is your safest and often most convenient option.
- Royalty-Free Music and Sound Effects: Purchase or download audio from platforms that offer royalty-free licenses (e.g., Epidemic Sound, Artlist, Freesound.org with appropriate licenses). Always read the license carefully to ensure it permits use in games and commercial projects on platforms like Roblox.
- Creative Commons Licenses: Some audio is available under Creative Commons licenses. Again, read the specific license (e.g., CC-BY, CC-BY-SA, CC0) to understand usage terms. CC0 (public domain) is safest.
- Create Your Own: The most secure method is to create all your sound effects and music yourself, or hire a composer/sound designer who grants you full rights.
Always err on the side of caution. For US gamers and creators who value building a sustainable presence, ensuring all your assets are legally cleared protects your hard work and reputation.
How Do I Optimize Sound Performance in Roblox Studio for All Devices?
Optimizing sound performance in Roblox Studio for all devices, especially mobile, involves smart asset management, efficient scripting, and thoughtful spatial audio design. The goal is to minimize resource strain while maximizing audio quality and responsiveness, ensuring a smooth experience for the 87% of US gamers who regularly play and often switch between mobile and PC platforms.
Key strategies for sound optimization include:
- Efficient Asset Management:
- Compress Audio: Use MP3 or OGG formats, which are compressed and have smaller file sizes. Avoid uncompressed WAV files for anything but very short, critical sounds.
- Trim and Loop Properly: Edit audio files to their exact length. For looping sounds, ensure they loop seamlessly to avoid glitches and unnecessary file size.
- Use Roblox's Audio Library: Leverage Roblox's built-in audio assets. They are already optimized for the platform.
- Moderate File Sizes: Keep individual audio file sizes reasonable. Very large files can cause significant loading delays.
- Smart Scripting Practices:
- PreloadAsync: Use
ContentProvider:PreloadAsync()for crucial sounds that need to play instantly upon a specific event. This loads the audio data into memory before it's needed, preventing delays. Be selective with preloading to avoid excessive memory usage at startup. - Reuse Sound Instances: Instead of creating new 'Sound' objects every time, have a pool of 'Sound' objects in 'ReplicatedStorage' or a designated 'Part' and dynamically change their 'SoundId' property and play them. This reduces object creation overhead.
- Avoid Excessive Playbacks: Implement rate limits or cooldowns for rapidly firing sound effects (e.g., machine gun fire) to prevent hundreds of sounds from attempting to play simultaneously, which can cause lag.
- Disable Sounds When Not Needed: Stop or destroy 'Sound' objects that are no longer in use to free up resources. For ambient sounds in areas players leave, stop them when the player exits the zone.
- PreloadAsync: Use
- Spatial Audio Considerations:
- Conservative RollOffDistances: Don't set 'RollOffMaxDistance' to extremely high values unless absolutely necessary. Sounds with vast ranges consume more resources as the engine calculates their position relative to the player.
- SoundGroup Management: Group related sounds into 'SoundGroup' instances. This allows for easier collective volume control and can help manage performance by applying global changes to categories of sounds.
- Test on Low-End Devices: Always test your game's audio performance on lower-spec mobile devices and older PCs. What sounds fine on a high-end gaming rig might cause choppiness or even crashes on a budget phone. Roblox's diverse player base means optimizing for a wide range of hardware is crucial for broad appeal.
What's the Difference Between a Sound and a SoundGroup in Roblox Studio?
In Roblox Studio, a 'Sound' object is the fundamental component that represents a single audio track, controlling its playback properties like volume, speed, and looping. A 'SoundGroup', on the other hand, is a container that holds multiple 'Sound' objects, allowing you to manage and control the properties of an entire category of sounds collectively. Think of a 'Sound' as an individual song and a 'SoundGroup' as an album or playlist.
Here's a breakdown of their key differences and uses:
Sound Object (Individual Audio Track)
A 'Sound' object is what you directly interact with to play, pause, and stop an individual audio file. It has properties unique to that specific sound.
- Purpose: Plays a single audio file.
- Key Properties:
- SoundId: The unique identifier for the audio asset.
- Volume: Controls the loudness of that specific sound (0-10).
- Looped: Determines if the sound repeats.
- Playing: Indicates if the sound is currently active.
- PlaybackSpeed: Adjusts the speed of playback.
- TimePosition: Where in the track playback begins.
- RollOffMode/Distance: For spatial (3D) audio properties.
- Usage: Ideal for specific sound effects (e.g., footsteps, gunshots, UI clicks), short musical cues, or individual ambient noises.
- Parenting: Can be parented to almost any object in the Explorer (Workspace, Parts, PlayerGui, Script, etc.). Its behavior can be affected by its parent (e.g., spatial audio if parented to a 'Part').
SoundGroup (Collection of Sounds)
A 'SoundGroup' acts as a mixer channel for related sounds, providing a hierarchical way to manage audio.
- Purpose: Manages properties for a collection of 'Sound' objects.
- Key Properties:
- Volume: Controls the collective loudness of all 'Sound' objects parented under it. This volume stacks with the individual 'Sound' objects' volumes.
- Name: Allows you to categorize your sounds (e.g., "Music", "SFX", "UI Sounds", "Environment").
- Usage: Essential for organizing your audio and providing players with control over different sound categories. For example, a 'SoundGroup' for "Music" allows players to turn down game music without affecting sound effects, which is a highly requested feature in modern games.
- Parenting: Typically placed in 'Workspace', 'Lighting', or 'ReplicatedStorage'. 'Sound' objects are then parented *under* the 'SoundGroup'.
By using 'SoundGroup's, you can easily implement options for players to adjust music, sound effects, or voice chat volumes independently, a feature that significantly improves the user experience for our busy gamer audience who value customization and comfort during their play sessions. This is a crucial element for creating a polished and professional Roblox game.
How to Adjust Volume and Playback Properties for Roblox Studio Sounds?
Adjusting volume and playback properties for Roblox Studio sounds is primarily done through the 'Properties' window of a 'Sound' object or via scripting, allowing for both static settings and dynamic control. For basic adjustments, you can directly modify a sound's properties. For advanced, interactive audio, scripting provides the flexibility to change these properties during gameplay, reacting to player actions or in-game events.
Here's how to manage these properties:
Direct Property Adjustments (Static)
- Select the Sound: In the 'Explorer' window, select the 'Sound' object you wish to modify.
- Use the Properties Window: In the 'Properties' window, you'll find several key settings:
- Volume: A number from 0 to 10. 0 is silent, 10 is max volume. Adjust this to set the initial loudness of your sound.
- PlaybackSpeed: A number representing the speed multiplier. 1 is normal speed, 0.5 is half speed, 2 is double speed. Useful for subtle variations or specific effects.
- Looped: A boolean (true/false) checkbox. If checked, the sound will repeat indefinitely after playing to its end. Essential for background music or ambient loops.
- Playing: A boolean (true/false) checkbox. If checked, the sound will start playing immediately when the game starts or when the 'Sound' object is created. If unchecked, you'll need to use a script to play it.
- TimePosition: A number in seconds. This sets the starting point of the sound. For example, setting it to 5 will make the sound start 5 seconds into its track.
Scripting for Dynamic Control
For sounds that need to change based on game events (e.g., volume decreasing as a player moves away, music changing during combat), you'll use Lua scripts.
Example Script (Local Script in StarterPlayerScripts or a Server Script for Workspace Sounds):
local sound = script.Parent.SoundObject -- Adjust path to your Sound object
-- Play the soundsound:Play()
-- Stop the soundsound:Stop()
-- Pause the soundsound:Pause()
-- Change volume dynamicallysound.Volume = 5 -- Sets volume to mid-levelsound.Volume = sound.Volume + 1 -- Increases volume by 1
-- Change playback speedsound.PlaybackSpeed = 1.2 -- Makes the sound play 20% faster
-- Adjust time positionsound.TimePosition = 30 -- Starts the sound 30 seconds in
-- Check if sound is playingif sound.IsPlaying then print("Sound is currently active!")end
Using scripts, you can create highly interactive and responsive audio experiences, making your game feel more alive and engaging for players who appreciate dynamic environments. This level of control is key to making Roblox games truly stand out.
What are the best free resources for Roblox Studio sounds?
The best free resources for Roblox Studio sounds are primarily Roblox's own Creator Marketplace and a selection of reputable royalty-free audio websites. These options provide a legal and accessible way to acquire high-quality audio without incurring costs, which is perfect for creators on a budget or those just starting out. Always prioritize sources that clearly state usage rights to avoid copyright issues.
Here are some top free resources:
- Roblox Creator Marketplace: This is your go-to. Roblox itself offers an extensive library of free-to-use audio assets directly within Studio. Simply open the 'Toolbox' (View tab -> Toolbox), select the 'Audio' category, and you can browse thousands of sounds and music tracks uploaded by Roblox or other creators who have made them publicly available. These assets are pre-moderated and safe for use in your games.
- Freesound.org: A massive collaborative database of audio snippets, samples, recordings, and bleeps released under Creative Commons licenses. You'll need to check each sound's specific license (many require attribution, some allow commercial use, some don't). It's a treasure trove for sound effects.
- Zapsplat.com: Offers thousands of free sound effects and music tracks. They have a generous free license with attribution, and a paid option for commercial use without attribution. Great for finding professional-grade sounds.
- OpenGameArt.org: While primarily for game art, this site also hosts a good collection of royalty-free music and sound effects, often with Creative Commons or public domain licenses suitable for game development.
- Incompetech.com: Kevin MacLeod offers a vast library of royalty-free music under a Creative Commons Attribution license. If you need background music for your game and are willing to credit him, this is an excellent source.
- Pixabay.com: Known for free images and videos, Pixabay also has a growing section of free music and sound effects, mostly under their own license which is usually very permissive for commercial use without attribution.
When using any external resource, always download the highest quality version available and remember to carefully read the specific licensing terms for each asset. This due diligence ensures your game remains compliant and helps you build a solid reputation as a creator within the Roblox community.
Conclusion: Master Roblox Studio Sounds for Next-Level Games
You've navigated the ins and outs of Roblox Studio sounds, from adding custom tracks and implementing spatial audio to troubleshooting common issues and optimizing performance for every device. The power of sound in your game can't be overstated; it's the invisible hand that guides emotions, provides crucial feedback, and transforms a good game into an unforgettable experience. For today's busy US gamers, often balancing life with their passion, immersive audio creates that much-needed escape and sense of accomplishment.
By applying these practical tips, you're not just adding sound; you're crafting an auditory landscape that resonates with players, enhances their enjoyment, and keeps them coming back. Remember, consistent testing across various devices is your best friend in ensuring your game sounds fantastic for everyone. Your commitment to high-quality audio will truly make your Roblox creations shine.
What's your biggest gaming challenge when it comes to sound design or balancing game dev with life? Comment below and share your insights!
FAQ Section
How do I make my Roblox game music fade in or out?
To fade music in or out in Roblox Studio, you typically use a script to gradually change the sound's Volume property over time. You can use a 'for' loop or a 'TweenService' to smoothly interpolate the volume from 0 to its target (for fading in) or from its current volume to 0 (for fading out) over a specified duration. This creates a more professional and less abrupt audio transition.
What is the maximum file size for audio in Roblox Studio?
Roblox Studio generally allows individual audio files to be up to 20MB in size and around 7-10 minutes in length. However, it's always best practice to keep your audio files as small as possible through compression (MP3 or OGG) to ensure faster loading times and better performance, especially for players on mobile devices or with slower internet connections. Always check the latest Roblox documentation for exact limits as they can change.
Can I change the pitch of a sound in Roblox Studio?
Yes, you can change the pitch of a sound in Roblox Studio by modifying the 'PlaybackSpeed' property of the 'Sound' object. Increasing the 'PlaybackSpeed' (e.g., to 1.2 or higher) will make the sound play faster and at a higher pitch, while decreasing it (e.g., to 0.8 or lower) will make it slower and at a lower pitch. This is a great trick for adding variation to sound effects or creating unique audio distortions.
How do I make a sound only play for one player in Roblox Studio?
To make a sound play only for one player, you should create or access the 'Sound' object through a 'LocalScript'. Place the 'LocalScript' in a client-side location like 'StarterPlayerScripts' or within a player's 'PlayerGui'. Sounds played via 'LocalScript's in these client-only contexts will only be audible to the local player running that script, perfect for private notifications or character-specific audio cues.
Are there any common sound bugs in Roblox Studio I should know about?
Yes, common Roblox Studio sound bugs include sounds sometimes not playing immediately (often due to not being preloaded), sounds cutting out on mobile devices (due to resource limits or too many concurrent sounds), and spatial sounds not behaving as expected (incorrect 'RollOff' settings or attachment to non-physical parts). Checking the 'Output' window for errors and thoroughly testing on various devices are key to identifying and fixing these issues.
How do I loop a background music track in my Roblox game?
To loop a background music track, simply select the 'Sound' object in the 'Explorer' window and check the 'Looped' property in the 'Properties' window. If you're starting the sound via a script, ensure this property is set to 'true' before calling Sound:Play(). This will make the music continuously repeat from the beginning once it reaches its end, providing a consistent soundtrack for your game.
What is a good volume level for background music vs. sound effects?
A good general guideline is to set background music to a lower volume than crucial sound effects to ensure player feedback and gameplay cues are not drowned out. Typically, music might be set between 'Volume' 2-4, while important sound effects like hits, UI feedback, or environmental alerts are louder, perhaps 5-8. Using 'SoundGroup's to manage these categories allows players to fine-tune their preferred mix, which enhances their overall experience.
Enhance Roblox game immersion with sound effects and music Learn to add and manage audio assets Optimize sound performance for all devices Troubleshoot common Roblox Studio sound issues Understand spatial audio and its impact Create dynamic and engaging audio experiences
35


How To Make A Sound System In 30 Seconds Roblox Studio YouTube Hqdefault . How To Add Custom Sound Effects I ROBLOX STUDIOS YouTube . Sounds Tutorial In ROBLOX Studio YouTube . Roblox Studio How To Script Ontouch Sound YouTube . Roblox Studio How To Make SOUND REGIONS Area NO SCRIPTING YouTube


How To Upload Audio To Roblox Studio Full Guide YouTube . How To Upgrade An FPS Sound System In Roblox Studio Tutorial YouTube . How To Add Sound Effects Into Your Game Roblox Studio YouTube . HOW TO MAKE SOUND REGIONS ROBLOX STUDIO YouTube . Come Usare Gli Audio Roblox Studio ITA YouTube


Level Up Your Roblox Soundboards Explained . How To Add Footstep Sounds Effects Roblox Studio YouTube . How To Create Footstep Sounds In Roblox Studio Tutorial YouTube . Roblox Studio Nas L Ndirilir Ve Kullan L R Webp. How To Make A Sound Play When Clicked On A Part Roblox Studio


How To Add Audio In Roblox Studio Step By Step YouTube . How To Make Sound Regions In Roblox Studio YouTube . Roblox Studio Sounds And Music Malaysia YouTube . A Quick Guide On How To Add And Change Sounds In Your Game In Roblox . Roblox Studio How To Create Sound Regions YouTube


Roblox Studio Sounds . Roblox Studio How To Make SOUND REGIONS Area YouTube . How To Add Sound In Roblox Studio YouTube . How To Upload Audio To Roblox Studio Easy YouTube . Roblox Studio Audio Tutorial Add Sounds In 1 Minute YouTube Hqdefault


How To Change The Walking Sound In Roblox Studio YouTube . How To Create SOUND EFFECTS In Roblox Studio YouTube . How To Play Music Roblox Studio At Bernadette Williams Blog . Unlocking Music In Roblox MIDI Is It Possible 1200x1769 . Roblox Music Codes 2026 How Song IDs Work And The Best Ones To Try Image 633 1


Roblox Studio Sound YouTube . How To Use Sounds Audios In Roblox Studio Roblox Programming Tutorial . ROBLOX Roblox Studio Sound Preview Problems YouTube . How To Add Sound In Roblox Studio YouTube . How To Make A Sound Play After Some Time Roblox Studio Tutorial