Ever wondered how to effectively test your Roblox clothing designs before hitting that upload button and spending your hard-earned Robux? For many busy gamers balancing work, family, and precious playtime, efficiency is key. This comprehensive guide provides actionable steps and expert tips to ensure your custom shirts, pants, and T-shirts look perfect on all avatar types, fit flawlessly, and avoid costly rejections. Discover the essential tools, techniques, and common pitfalls to sidestep, ensuring your creations meet Roblox's standards and truly shine in the marketplace. We'll cover everything from setting up a test environment in Roblox Studio to iterative previewing and optimizing for diverse avatars, helping you save time, Robux, and frustration. Dive into smart strategies that empower you to create high-quality, sought-after clothing without the usual headaches, allowing you more time to enjoy gaming with friends or tackling new challenges.
Top 5 Natural Questions About Testing Roblox Clothing
1. How do Roblox creators check clothing designs before publishing?
2. What's the best way to preview a Roblox shirt on an avatar?
3. Can I test Roblox pants for free before uploading them?
4. Why does my Roblox clothing look different after uploading?
5. How to avoid Robux waste on rejected Roblox outfits?
7 Essential Q&A for Roblox Clothing Creators
Q: What exactly is a Roblox clothing template?
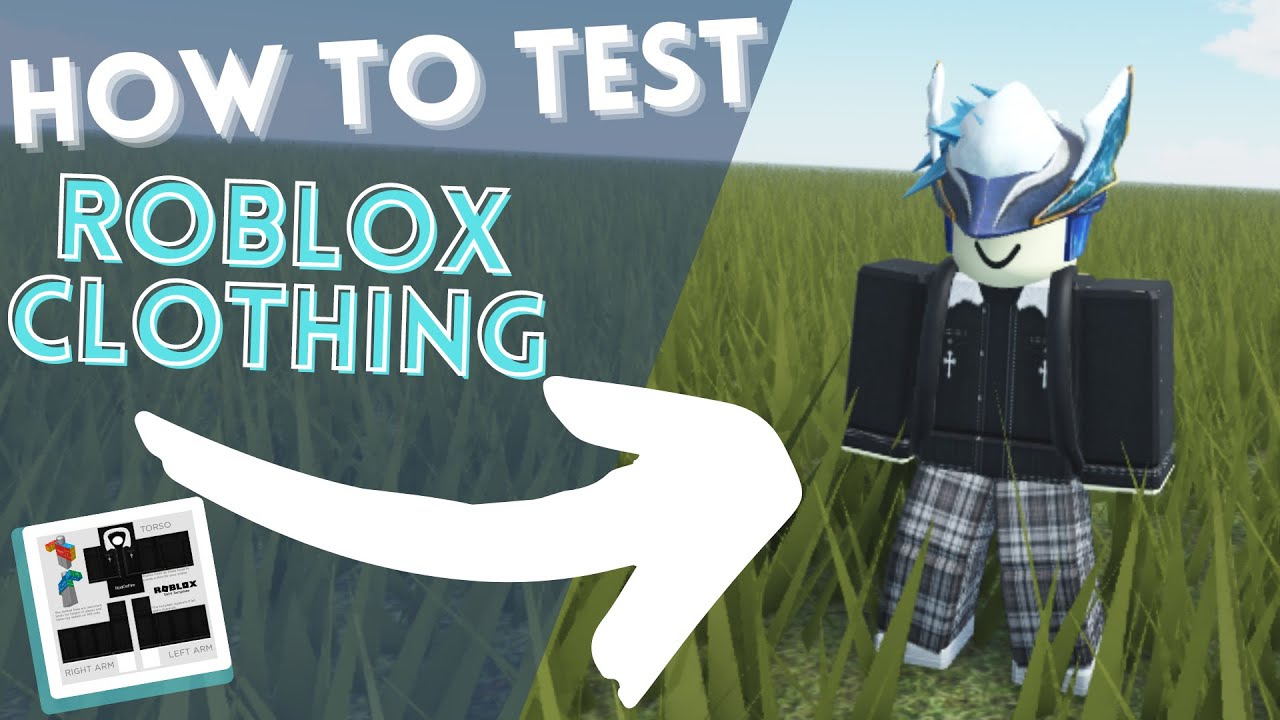
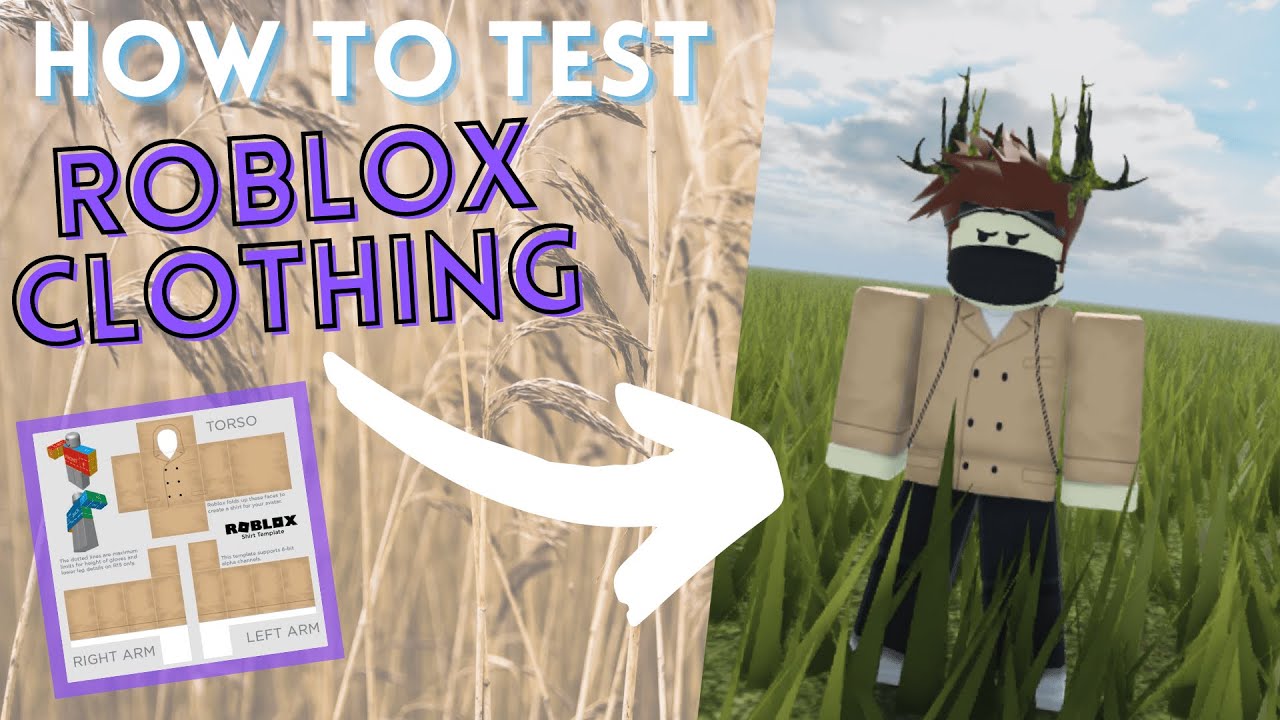
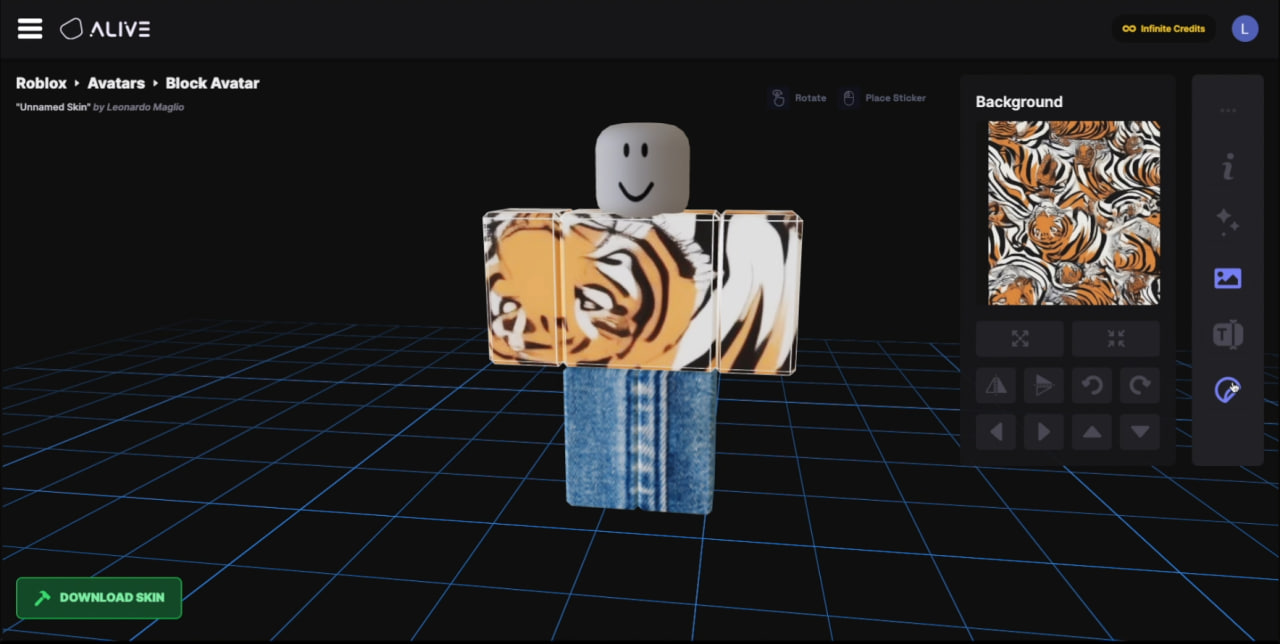
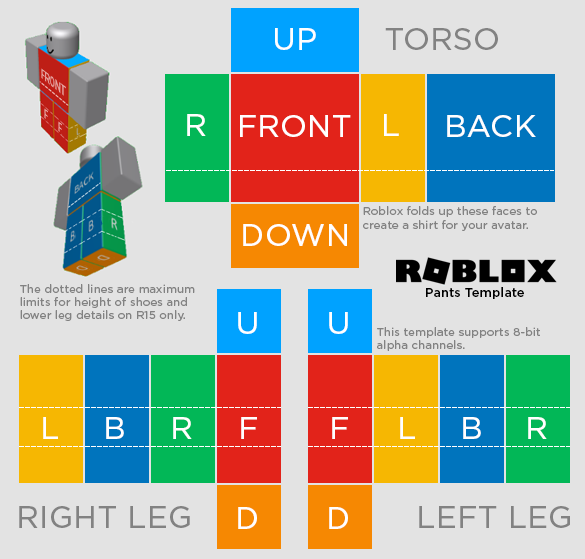
A: A Roblox clothing template is a 2D image file (typically PNG) that acts as a blueprint for your 3D apparel. It has specific sections mapped to different parts of the Roblox avatar body (torso, arms, legs). Creators design their textures and graphics onto these designated areas using image editing software, which Roblox then wraps around the avatar.
Q: How do I get my clothing template into Roblox Studio for testing?
A: To get your template into Roblox Studio, you first need to upload your PNG image file to Roblox as a 'Decal' through the Create page on the Roblox website. This process generates an 'Asset ID'. Once you have this ID, you can insert a 'Shirt' or 'Pants' object into a 'Dummy' avatar in Roblox Studio and paste the Decal's Asset ID into the 'Texture' property of that clothing object, making your design visible on the dummy.
Q: Why do my designs sometimes look stretched or misaligned in Roblox Studio?
A: Stretched or misaligned designs often occur if your template isn't precisely mapped to the avatar's UVs (the 2D representation of a 3D model). This can be due to incorrect template dimensions, drawing outside the designated areas on the template, or not accounting for how the 2D image wraps around a 3D cylindrical limb. Consistent iterative testing helps identify and fix these issues.
Q: Can I test how my clothing looks on custom avatar scales?
A: Yes, absolutely! In Roblox Studio, after inserting an R15 dummy, you can select it in the 'Explorer' window. In the 'Properties' window, locate the 'BodyTypeScale' and 'ProportionScale' properties. Adjusting these values will change the dummy's body shape and size, allowing you to see how your clothing adapts to various common player avatar dimensions. This is crucial for broad appeal.
Q: What’s the difference between a Shirt, Pants, and T-Shirt in Roblox?
A: A 'Shirt' covers the avatar's torso and arms, while 'Pants' cover the avatar's legs. Both require a full 585x559 pixel template. A 'T-Shirt' is different; it's a small 128x128 pixel decal applied only to the front of an existing Shirt or the avatar's torso, effectively layering a graphic over an base outfit. T-Shirts are cheaper to upload than Shirts or Pants.
Q: What are 'UV Maps' in the context of Roblox clothing?
A: UV maps are essentially the flattened 2D coordinates of a 3D model's surface. For Roblox clothing, the template itself is a visual representation of the avatar's UV map. When you design on the template, you're placing textures on these 2D coordinates, which Roblox then uses to project the texture onto the 3D avatar model. Understanding this helps predict how your 2D design will appear in 3D.
Q: Are there any specific lighting conditions I should test my clothing in?
A: It's a good practice to test your clothing under different lighting conditions in Roblox Studio. You can adjust the 'Lighting' properties in the 'Explorer' window (e.g., 'Ambient', 'Brightness', 'ColorCorrection'). This helps you see how colors and details are perceived by players in various game environments, ensuring your design looks good regardless of the in-game atmosphere.
Hey there, fellow Roblox creator! If you're anything like the average US gamer, juggling work, family, and grabbing those precious hours of gaming to unwind, you know time is gold. The last thing you want is to spend your valuable time meticulously crafting a killer Roblox outfit, only to upload it, pay the Robux fee, and find it looks completely off or, worse, gets rejected. It's a common pain point for creators, especially those of us who value efficiency and getting things right the first time so we can get back to our favorite cozy games or competitive matches with friends.
You've poured your creativity into a new shirt or pair of pants, but how do you truly know it will look perfect on every avatar, in every lighting condition, before it goes live? Wasting Robux on a poorly tested item stings, right? This guide is your ultimate toolkit to master the art of testing Roblox clothing before uploading. We'll show you exactly how to prevent those frustrating surprises, save your Robux, and ensure your designs are top-notch and ready for the metaverse. With 87% of US gamers regularly engaging with their favorite platforms, and Roblox's creator economy booming this month, making your creations stand out starts with quality assurance.
Let's dive into practical, actionable steps that will streamline your creation process and get your clothing designs approved and looking fantastic, so you can spend less time troubleshooting and more time gaming or hanging out with your online crew.
Why Is Thorough Testing Crucial Before Uploading Roblox Clothing?
Testing your Roblox clothing is more than just a good idea; it's a non-negotiable step for any serious creator. Think of it like this: you wouldn't launch a new game without extensive bug testing, would you? The same applies to your digital apparel. Untested clothing can lead to misaligned textures, weird stretching on different body types, transparency issues, and even outright rejection by Roblox's moderation system. For busy gamers who value their time and money, these are costly mistakes. Each upload costs Robux, and rejections mean losing that fee and starting over. Ensuring your item looks professional reduces negative feedback, enhances your reputation, and ultimately helps you make more sales, giving you more Robux for new games or that sweet limited-time accessory.
What Tools Do I Need to Effectively Test My Roblox Clothing?
The primary tool you'll need is Roblox Studio. It's free, powerful, and offers the best environment for testing. You'll also need your clothing template files (PNG format). Beyond that, having a good image editing software like Photoshop, GIMP, or even free online tools like Photopea is essential for creating and refining your designs. For optimal testing, a reliable internet connection and a PC or Mac capable of running Roblox Studio smoothly are also key, especially for busy adults who need their creative tools to perform without hitches.
How Do I Set Up a Test Environment in Roblox Studio for Clothing?
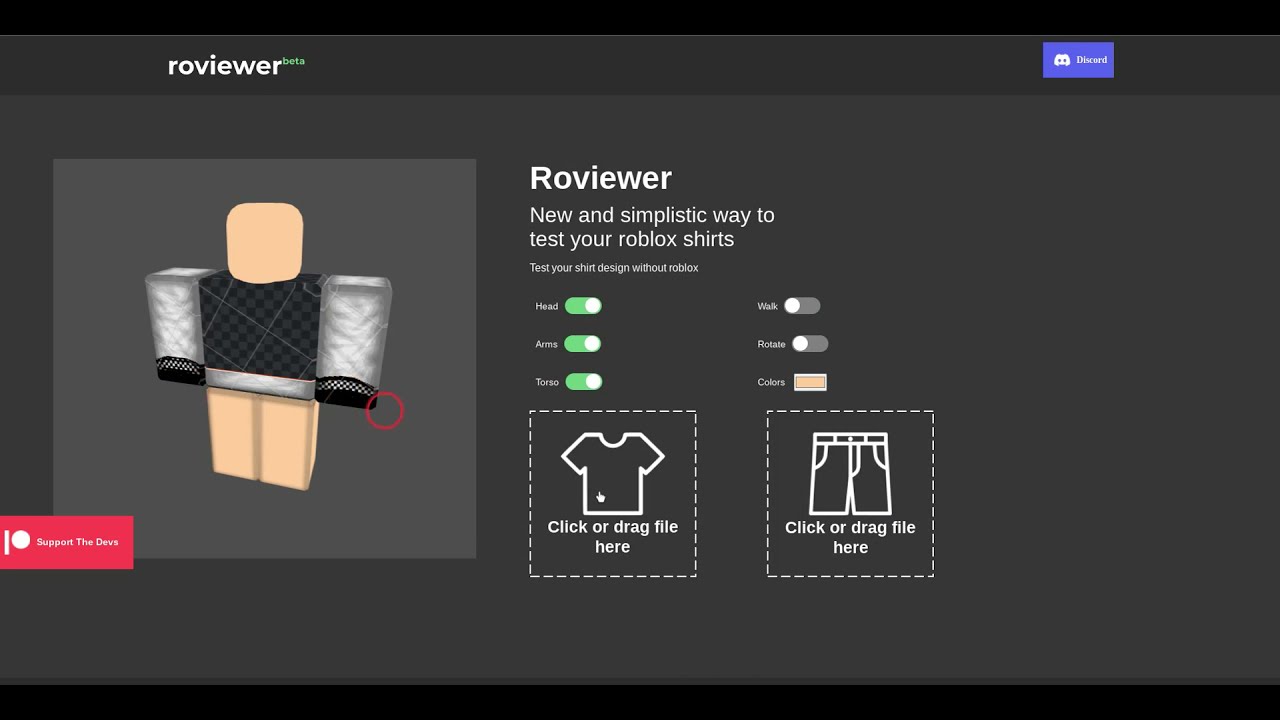
Setting up your test environment is straightforward. First, open Roblox Studio and create a new 'Baseplate' experience. Next, insert a 'Dummy' character from the 'Model' tab (under 'Rig Builder' select 'R15' or 'R6' depending on your design's target). This dummy acts as your avatar model. You can insert multiple dummies of different sizes and body types to test versatility. Crucially, save your clothing template as a local image file (PNG). Within Roblox Studio, navigate to 'Explorer' tab, find your Dummy model, then right-click on it and select 'Insert Object' and choose 'Shirt' or 'Pants'. In the properties window of the newly inserted clothing item, locate the 'Texture' property and input the asset ID of your clothing. To get this, you'll temporarily upload your texture to Roblox as a 'Decal' (you don't need to make it public) to get its asset ID. This lets you preview the clothing directly on the dummy before a full upload.
What Are the Common Issues to Look for During Roblox Clothing Testing?
When testing, keep an eye out for several common pitfalls:
- Texture Alignment: Does the design wrap correctly around the avatar? Are there any seams or stretching in awkward places?
- Transparency Issues: Are transparent areas showing correctly, or are they appearing as solid white/black?
- Layering Problems: If your clothing is designed to go over other items, does it clip through or look odd?
- Body Part Mismatch: Does the clothing fit well on R6, R15, and various avatar body types (e.g., blocky, feminine, masculine, custom scaled)?
- Color Accuracy: Do the colors appear as intended in different lighting conditions within Studio?
- Moderation Compliance: Does your design contain any inappropriate content, copyrighted material, or text that could lead to rejection?
Catching these early saves significant time and Robux.
How Can I Effectively Preview Textures and Details on Different Roblox Avatar Types?
To effectively preview textures, use multiple 'Dummy' models in Roblox Studio. Insert R15 and R6 dummies. For R15, you can adjust their 'BodyTypeScale' and 'ProportionScale' properties in the 'Properties' window to mimic various body shapes players use. This helps you see how your design stretches or compresses. Additionally, try out different material variants on your dummy (e.g., plastic, fabric) to see how your texture reacts. Many gamers spend time customizing their avatars, so making sure your clothing looks good across a spectrum is vital. Consider inserting a few pre-made free-to-use avatar models from the Toolbox to test on more complex shapes, much like gamers might try on clothes in real life before buying.
What Is the Best Workflow for Iterative Testing and Design Refinement?
An efficient workflow is key, especially for busy creators. Here’s a simple loop:
- Design in Editor: Create or modify your clothing template in your image editing software.
- Save Locally: Save as a PNG.
- Upload as Decal (Temporary): Go to the Roblox Create page, upload your PNG as a Decal (don't make it public, just get the Asset ID).
- Test in Studio: Paste the Decal ID into the 'Texture' property of your clothing item on a Dummy in Roblox Studio.
- Analyze & Adjust: Observe fit, textures, and details. Make notes of any issues.
- Repeat: Go back to your image editor, make changes, re-upload as a NEW decal (or overwrite if allowed, though new ID is safer for history), and test again.
This iterative process allows for rapid adjustments without incurring multiple Robux upload fees for the final clothing item. This month's trends show players appreciate finely tuned designs, and this method helps you deliver that.
Can I Test Clothing with Accessories or Layered Items in Roblox Studio?
Absolutely, and you should! Many Roblox avatars combine clothing with various accessories, hats, and layered clothing items. In Roblox Studio, you can insert additional accessories from the 'Toolbox' or create your own to see how your clothing interacts with them. This helps identify any clipping issues or aesthetic conflicts. For example, if you're designing a shirt, test it with a common jacket or backpack to ensure compatibility. This foresight ensures a smoother experience for players who value seamless customization, allowing them to balance their unique style with in-game purchases.
How Do I Ensure My Roblox Clothing Passes Moderation the First Time?
Passing moderation requires adherence to Roblox's Community Standards and Terms of Use. Key steps include:
- No Copyright Infringement: Do not use copyrighted logos, characters, or designs from other brands or media. This is a common rejection reason.
- Appropriate Content: Ensure your designs are family-friendly. No sexually suggestive, hateful, or violent imagery.
- Clear Textures: Avoid blurry, low-resolution, or intentionally distorted images that could be hard for moderators to interpret.
- Originality: Strive for unique designs. While inspiration is fine, direct copying is not.
- Test All Angles: Make sure no hidden inappropriate content is inadvertently visible from certain camera angles.
Remember, Roblox moderation aims to keep the platform safe and fun for its diverse player base, which includes many younger users. A clean design is always the best policy.
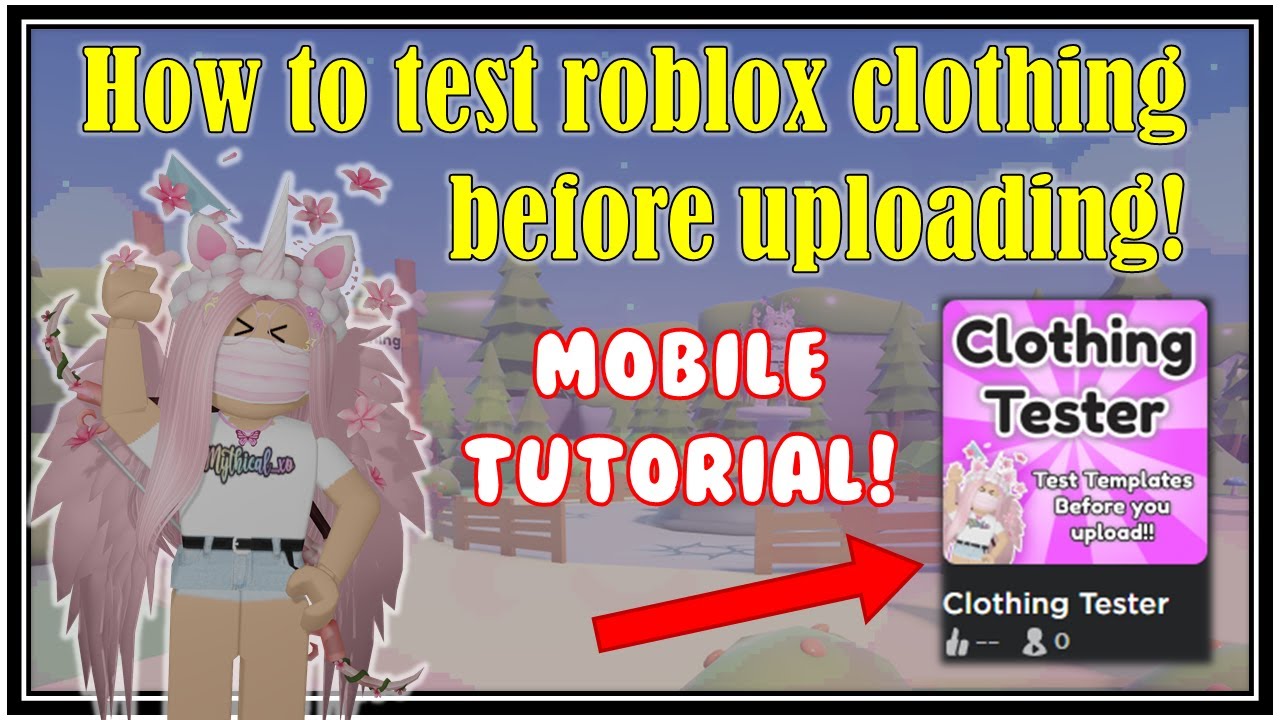
Are There Any Free Alternatives or Methods for Quick Roblox Clothing Previews?
While Roblox Studio is the gold standard and free, some creators use simpler methods for quick checks. You can create a new 'Image Label' in a ScreenGui in Studio and set its 'Image' property to the Asset ID of your clothing texture. This provides a flat preview but won't show how it wraps around an avatar. For even quicker checks outside of Studio, some online image editors allow you to overlay your design onto a Roblox clothing template reference image, giving a rough idea of placement. However, for true fit and 3D rendering, Roblox Studio remains unparalleled. It's an investment of time that pays off in quality.
What's the Final Checklist Before Uploading My Roblox Clothing for Good?
Before you commit those Robux and click 'Upload', run through this final checklist:
- Studio Test: Has it been tested thoroughly on R6, R15, and varying body scales in Roblox Studio?
- Texture Check: Are all textures aligned perfectly, with no stretching or pixelation?
- Transparency: Is transparency working as intended, with no unexpected solid areas?
- Clipping: Does it avoid clipping with common accessories or layered items?
- Moderation Review: Does it meet all Roblox Community Standards? (No copyright, no inappropriate content).
- Resolution: Is your template 585x559 pixels for shirts/pants or 128x128 for T-shirts, and saved as a high-quality PNG?
- Cost Ready: Do you have the necessary Robux for the upload fee?
A quick double-check can save you a lot of hassle and ensure your creative efforts are rewarded.
In conclusion, mastering the art of testing your Roblox clothing before uploading is a game-changer for any creator. It’s about more than just avoiding rejection; it’s about respecting your time, maximizing your Robux, and ensuring you deliver a high-quality product that stands out in Roblox's vibrant marketplace. For busy gamers who appreciate efficiency and value, these steps are your shortcut to success. By using Roblox Studio effectively, understanding avatar nuances, and following a smart iterative workflow, you'll elevate your creations and make a real impact.
What’s your biggest challenge when designing or uploading clothing on Roblox? Share your tips or questions in the comments below! Let’s build an even better creator community together.
FAQ Section
Q: Can I test my clothing on my actual Roblox avatar before uploading?
A: No, you cannot directly test your clothing on your personal Roblox avatar before uploading it and making it public (or testing it privately as a user). Roblox Studio's Dummy models are the official and most effective way to preview designs prior to the final upload.
Q: What is the optimal resolution for Roblox clothing templates?
A: For shirts and pants, the optimal template resolution is 585x559 pixels. For T-shirts (decals applied to the front of a shirt), the recommended resolution is 128x128 pixels. Using these dimensions ensures clarity and proper scaling.
Q: How long does Roblox moderation take for clothing uploads?
A: Moderation times can vary, but typically, Roblox clothing items are reviewed within a few hours to a day. During peak times or for complex designs, it might take longer. Testing thoroughly helps avoid delays from re-submission.
Q: Is it possible to update an uploaded clothing item without paying the Robux fee again?
A: Once a clothing item is uploaded and approved, you generally cannot update its texture or design without re-uploading a new version, which incurs another Robux fee. This is why thorough testing beforehand is so vital.
Q: What’s the difference between R6 and R15 avatars for clothing design?
A: R6 avatars have 6 body parts (limbs and torso are single blocks), while R15 avatars have 15 body parts (more articulated, with separate upper/lower limbs, etc.). Your clothing needs to be designed to accommodate these different body structures to fit properly on both.
Essential Roblox Studio setup for clothing tests. Understanding avatar body types for fit. Pre-upload texture and transparency checks. Debugging common clothing design issues. Efficient iterative testing workflow. Tips for passing Roblox moderation.
35


How To Test Roblox Clothing Before Uploading 2026 Roblox Tutorial . HOW TO TEST ROBLOX CLOTHING BEFORE UPLOADING ALL PLATFORMS YouTube . How To Test Your Roblox Clothes Before Sharing Them 5 Ways V4 460px Test Roblox Clothes Step 22 Version 3 . How To TEST Roblox Clothing BEFORE Uploading YouTube . How To TEST Roblox Clothing On MOBILE Before Uploading YouTube


HOW TO TEST ROBLOX CLOTHING BEFORE UPLOADING YouTube . HOW TO TEST ROBLOX CLOTHING BEFORE UPLOADING ALL PLATFORMS YouTube . How To Test Your Roblox Clothing Before Uploading It 2023 Method . HOW TO TEST CLOTHING BEFORE UPLOADING ONTO ROBLOX YouTube . How To Test A Piece Of Clothing Before Uploading It To Roblox Roblox


How To Test Your Roblox Clothes Before Sharing Them 5 Ways V4 460px Test Roblox Clothes Step 9 Version 3 . How To Test A Roblox Shirt Before Uploading Easy Preview Method 2026 Hqdefault . Test Your ROBLOX Templates Before Uploading Clothing Tester YouTube . How To Look At Roblox Clothing Before Uploading YouTube Hqdefault . How To Test Your Roblox Clothes Before Sharing Them 5 Ways V4 460px Test Roblox Clothes Step 8 Version 3


How To Easily Test Your Clothing Without Uploading On Roblox YouTube . How To Test Your Roblox Clothes Before Sharing Them 5 Ways V4 460px Test Roblox Clothes Step 6 Version 4 . How To TRY ON Your Clothing Before Uploading On Roblox YouTube . How To Test Your Roblox Clothes Before Sharing Them 5 Ways V4 460px Test Roblox Clothes Step 2 Version 3 . How To Try On Roblox Clothes Before Uploading Shorts YouTube


How To Test Your Roblox Clothes Before Sharing Them 5 Ways Test Roblox Clothes Step 40 Version 2 . How To Test Your Roblox Clothes Before Sharing Them 5 Ways V4 460px Test Roblox Clothes Step 38 Version 3 . How To Test Your Roblox Clothes Before Sharing Them 5 Ways V4 460px Test Roblox Clothes Step 1 Version 3 . How To Test Your Roblox Clothes Before Sharing Them 5 Ways V4 460px Test Roblox Clothes Step 10 Version 3 . Roblox Clothes Tester Preview Shirts And Pants Before You Upload Roblox Video Thumbnail


How To UPLOAD CLOTHES On Roblox FULL GUIDE 2026 YouTube . Roblox Clothes Tester Preview Shirts And Pants Before You Upload Template Pants R15 07262019 . HOW TO TEST ROBLOX CLOTHING BEFORE UPLOADING ALL PLATFORMS Shorts Maxres2 . Test Classic Clothing Roblox Creator Hub Block Avatar Dressed . How To Test Your Roblox Clothes Before Sharing Them 5 Ways Crop 375 250 333px Nowatermark Create A Shirt In Roblox Step 25 Version 2


How To Test Your Roblox Clothes Before Sharing Them 5 Ways V4 460px Test Roblox Clothes Step 5 Version 3 . How To Test Your Roblox Clothes Before Sharing Them 5 Ways V4 460px Test Roblox Clothes Step 15 Version 3 . How To Test Your Roblox Clothes Before Sharing Them 5 Ways V4 460px Test Roblox Clothes Step 21 Version 3 . Roblox Shirt Test Your Guide To Getting It Right . How To Test Your Roblox Clothes Before Sharing Them 5 Ways V4 460px Test Roblox Clothes Step 12 Version 3